

This month over at our card sketch challenge at Club Scrap, Anne Marie and I decided to change it up a bit and do a sketch and technique challenge. Come play along - use just the sketch or try your hand at the chalkboard technique!
Chalkboard is all over the scrapbooking and decorating world - just check out Pinterest any day and you are sure to see something! There are a lot of tutorials out there on how to achieve this look, but I wanted to see how I could recreate this trend using primarily Club Scrap products. This technique was a lot of fun to try out - it really helped me look at my plethora of stamps in a different way and how I could incorporate different stamps into a cohesive final product. Here's a quick look at how I created this card:

First thing is to cut out your panel that you will be using for your chalkboard background. I used black cardstock, but you could use any dark color - gray or the traditional chalkboard green come to mind. I cut this panel to 2.5 x 3.5 inches for this particular sketch. You will be using white embossing powder, so I swiped my embossing buddy across the cardstock so the powder will end up exactly where I wanted it. This is important since the white powder will definitely stand out on the dark background.

I first tried out the design I had in mind on a scrap piece of paper - this will help me when I'm using clear VersaMark on the black cardstock. I used stamps from Give Thanks and from the new Neon Doodles stamp set - look for "hand-drawn" looking stamps to assist with the illusion of chalkboard art. Following my "sketch", I stamped with the clear ink. I stamped one image at a time since I was using the same stamp several times on the same panel, but if you are able to use a single collage image or create your own using several stamps, go right ahead and stamp it all at once.

Once I stamped with the clear ink, I poured the white embossing powder on my images and used a fine brush to clean up the images a bit. Be careful at the step - the powder attached to the ink is not set yet and can easily be moved. I concentrated on the more open areas where the powder was still sticking a bit.

Heat set the powder and your main image is done!
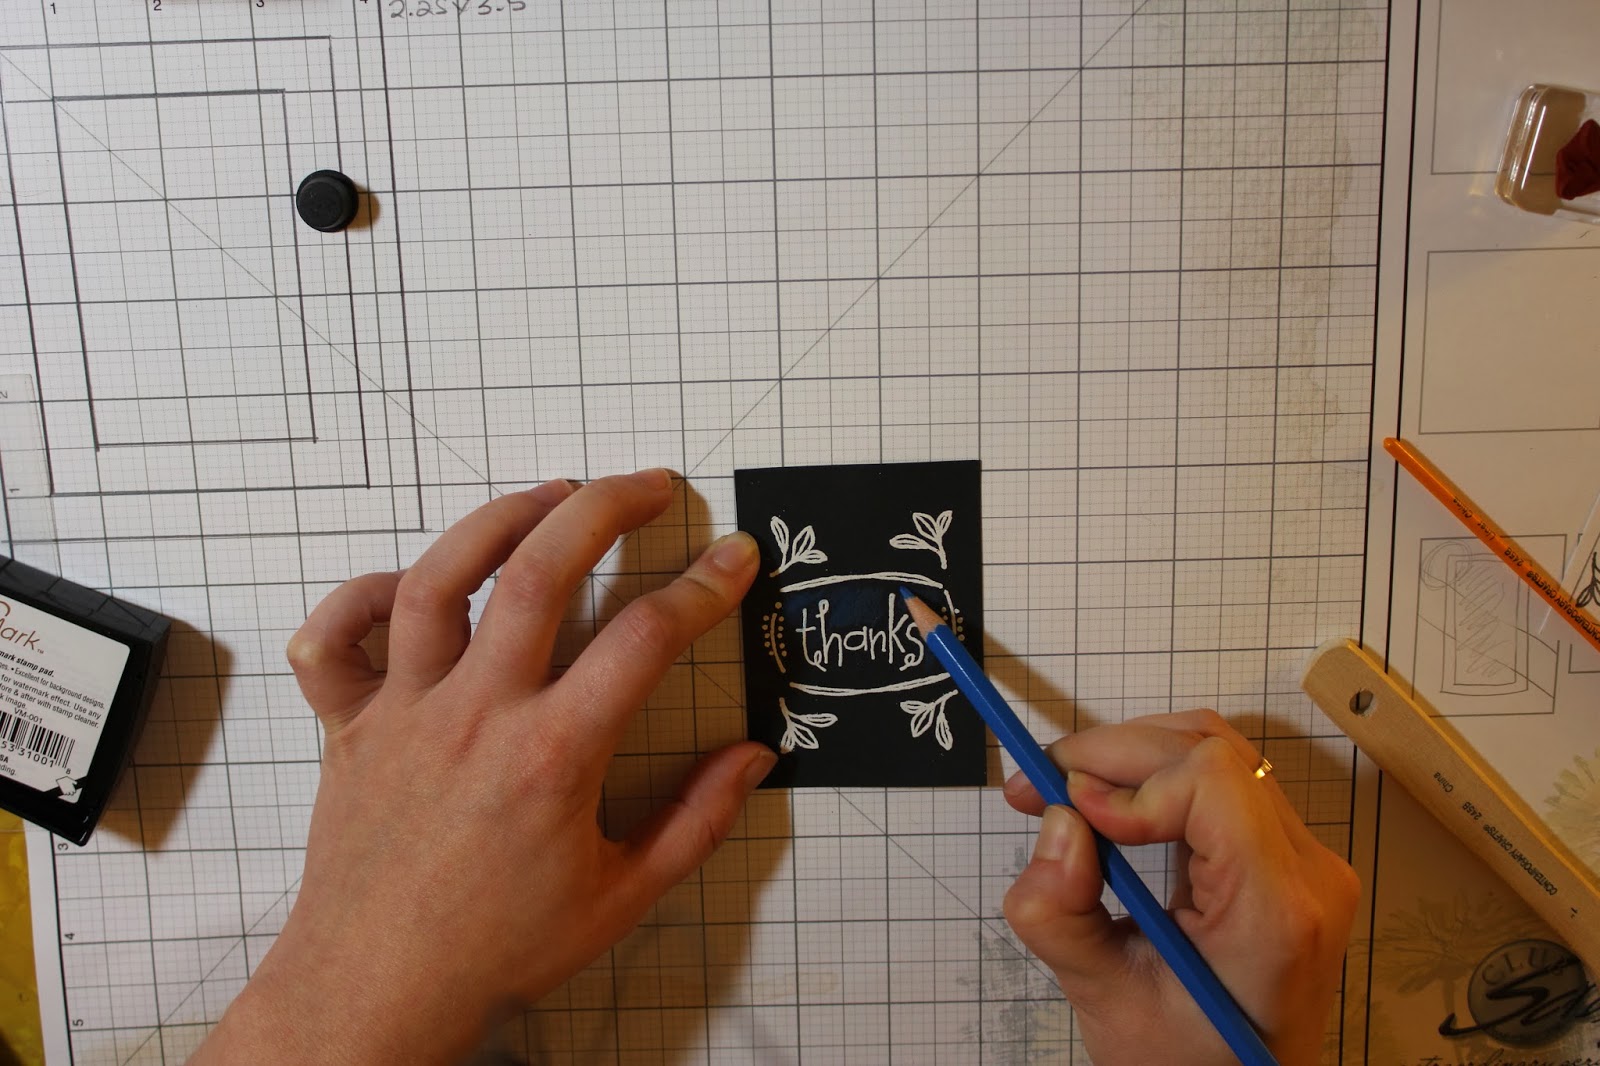
I added some color to my panel at this point with a colored pencil. I would recommend one to two colors, or you can keep it simple and add some lines with just a white pencil. I picked blue to compliment the cardstock I knew I would be using on the rest of the card.

The next step is to add the "shadow" to your image - this helps to make the image look like it's drawn on with chalk. You will be using the same stamps you used with the embossing powder with white pigment ink this time. This second image will be slightly offset from the embossed image, so I used a Stamp-A-Ma-Jig to help with placement since I'm using rubber stamps. If you are using clear stamps, this tool might not be necessary, but I find it helpful if you like to be exact with your placement.
I stamped the same images slightly offset from the embossed images - you can see this better in the completed card above.

Club Scrap makes a lot of great "noise" stamps. I used this one from the Full Circle Jr. kit to make a chalky background on my cardstock. A stark black background won't help with the illusion of chalkboard art - you have to make it look like it's been erased a few times and the chalk dust is still lingering. I inked this background stamp up with the white pigment ink again and stamped directly over the image and came away with a subtle background that I loved. Look through your collection of stamps - I'm sure there are a lot of background stamps that would lend themselves to this technique.

One other technique that will help with the hand-drawn look of this card is to actually hand-draw! I added a rectangular frame around my image with a white colored pencil and a clear ruler.

The final step is to add some white pigment ink around the edges of the panel. I used an ink applicator so that the ink was softened a bit. I also added a little of this ink directly to the panel in places where I felt that the background stamp was lacking a bit.
And that's it! Add your completed panel to your card using the sketch found here and you are all set. Hope you can look through your collection of stamps and see what combinations you can come up with. Can't wait to see what you create!
ETA: Go check out Julie's post here on how to make cards using this sketch and her ALCM (Assembly Line Card Making) steps! It's super cool.
Supplies // Paper: Club Scrap Fire & Ice Turquoise, Welcome Gray, From Stash: Club Scrap Black paper / Inks: Club Scrap Neon Blue, White Pigment / Stamps: Club Scrap Neon Doodles, Give Thanks, Full Circle Jr. / Tools: Club Scrap Acrylic Ruler, Ink Applicators; Inkadinkado Stamp-A-Ma-Jig, Embossing Buddy, White embossing powder, VersaMark / Embellishments: Sequins, Binder clip, American Crafts Glitter Ribbon in Silver, Bella Blvd Decorative Tape in Teal Stripe, colored pencils
Great job on this card Marya! Super fun technique too! I think I will definitely give it a go!
ReplyDeleteThat is SO cool! Thanks for sharing such a terrific technique/challenge with all of us!
ReplyDeleteLove this card and your tutorial. Great job!
ReplyDelete