Pages

February 27, 2015

Club Scrap Stacked Book Project


Happy Friday everyone!  I have a fun project to share with you today.  The Club Scrap Artist team each put their own spin on the Stacked Booked Project, so please check out the Club Scrap blog to see all of their creations!

I used the "naked" version of this project and papers from London Calling to create travel ephemera boxes to hold all of the ticket stubs, maps, and brochures I've picked up over the years.  As a scrapbooker, I have some packrat tendencies and it's hard to me to throw away these types of keepsakes, because I might need to scrap it someday!  I created a displayable project to hold on to these pieces until they are ready to go into my scrapbook.


I changed some specifications from the original instructions to make this project fit my needs.  Instead of wrapping the inside box with text weight paper, I simply covered each side with cardstock by spreading bookbinding glue on the pieces of bookboard and adhering these to paper.  I then used a craft knife to cut the paper along the edge of the bookboard to create the perfectly covered sides of the box.


I also cut out two pieces of extra bookboard to create additional compartments to store smaller items and the Instagram albums I made for each box.


I made three sizes of albums: 2.5 in, 3 in, and 3.5 in to hold my square photos.  They fit perfectly in the square compartment I created especially for them.


You can see my Poland mini album here, and below I share some of the details of the insides of my Spain and London albums.


Similar to my Poland album, I used the cutaparts from the London Calling collection to add words to my albums and I again used vellum from my stash to add some softness to the pages. I love the simplicity of this album because it really allows the photos to shine!


For my London album, I switched up the closure system I used on the front of the album because I really wanted to use this Union Jack ribbon.  I also sprinkled some strips of the Underground washi and the cute stamp stickers from the Lite kit in this album for some added flair.

Thanks for stopping by and checking out this project!  Be sure to check out the other amazing versions my fellow team members have created as well!

Supplies // Paper: Club Scrap: Green Print, Green Pattern PrintLight Green, Green PatternCutapart sheets (London Calling), Light Blue (Spring Chorus); Recollections: vellum Embellishments: Doodlebug Designs: baker's twine, eyelets and beads from stash Stamps: Greeting (London Calling) / Inks: Club Scrap: Sappphire and Moss Hybrid Inks / Tools: Martha Stewart Bone folder, Martha Stewart Scoring BoardCrop-A-Dile Big Bite, waxed linen thread

February 25, 2015

Club Scrap Blog Hop - London Calling

0215_blog hop photo 0215_blog hop_zpsrabbbjdv.jpg

Hello there and welcome to the February edition of the Club Scrap blog hop!  This month, we are creating lovely things with one of my new favorite collections, London Calling.  This month I combined my love of paper, albums, and Instagram to make a cute project.

If you traveled here from Tricia's blog, then you are following the hop!  If you've lost your way or just want to see all the links in one place, head over to the Club Scrap blog to see a list of all the talented bloggers participating today.

I still haven't gotten "board" (hahahahahaha I'm so clever) with making Pinterest boards as soon as I see the color palette released on the first of the month by Club Scrap.  It was so fun seeing both the London-related pins and fun projects I was inspired by using similar images found in this month's stamp sets:


Follow Marya Kaszubinski's board London Calling Mood Board - Club Scrap February 2015 on Pinterest.

I was specifically inspired by this pin to make my own Instagram mini album to house my pictures from some of my travels.  This was easy to whip up using the papers included in the Deluxe kit.


This particular mini album is not about my trips to London (although you might see a post about that album here soon...wink wink, nudge nudge).  This album is about my trip to Poland to visit a friend last May.  I was lucky enough to have to go to work in London when my friend was also in Europe for six weeks, so I took advantage of the proximity and hopped over to Krakow for a week.


This was a very easy project to construct.  I printed my Instagram photos at 2x2 inches for this album, but you could adjust for any size you want.  A quick recap of the steps to make this album is below:

  1. Create cover and inside pages: I cut a 2.5 inch by 7 inch piece of cardstock for the cover, and cut five 2.5 inch by 5 inch strips for the inside pages.
  2. Stitch album together: I first scored the cover at 2.5 and 5.25 inches to create the fold-over cover, and I scored the inside pages at 2.5 inches.  I then pierced holes .5 inch from the top and bottom along the middle score to make holes for the waxed linen thread I used to hold the whole thing together.  One simple in-and-out stitch is all you need!
  3. Create closures: I punched two circles out of paper and attached these to the front of the album with eyelets.  I then wrapped baker's twine around to keep the album closed when not in use.
  4. Decorate!  Use elements of this kit to your heart's content.

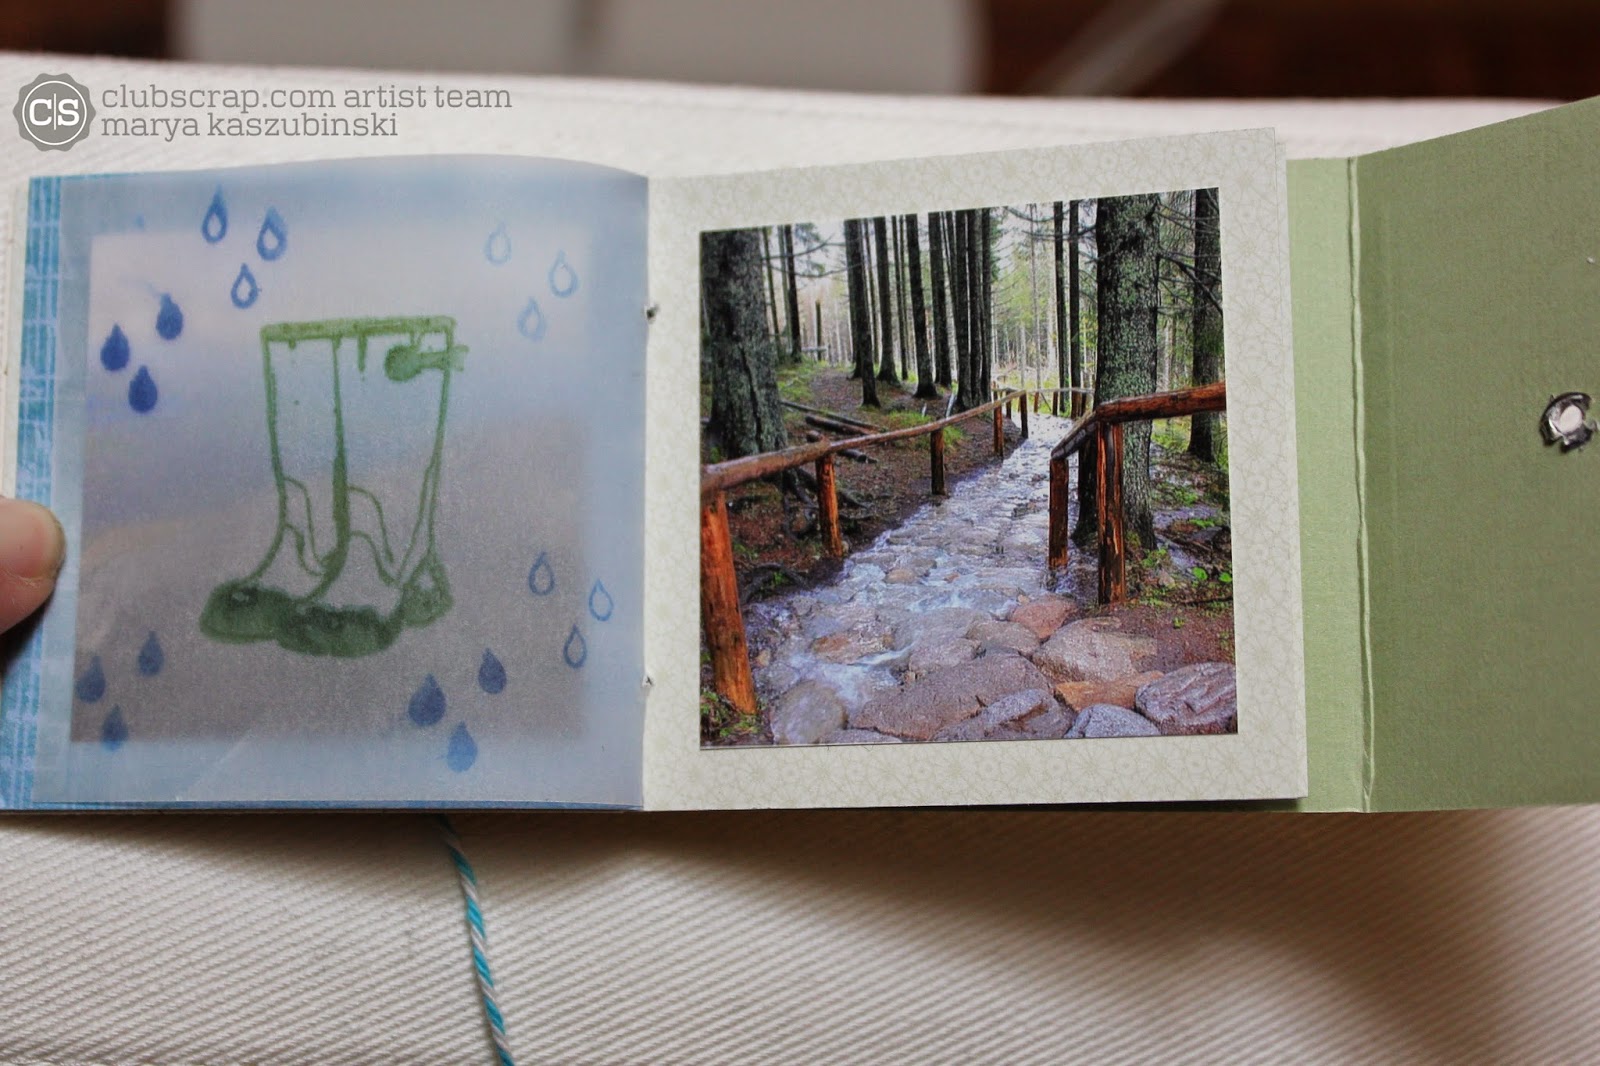
(Excuse my oh so dainty finger please.)  This kit, while perfect for London pictures, worked wonderfully with my Poland pictures as well.  This adorable rainboot and umbrella print paired nicely with a shot of the street I stayed on in Krakow.


I used some of the cutaparts from this kit to add some details to the mini pages.  This sentiment about vacation calories better be true (and that amazing piece of cuisine is zapiekanka and now I'm hungry.)


The square frame cutaparts were exactly 2.5 by 2.5 inches, and they fit right in this album!  They are perfect for highlighting a show-stopping picture (like this one from Morskie Oko in Zakopane).


I also added in some vellum from my stash to my pages - it was the perfect medium to add stamping to accompany pictures of our rainy hike.


(In case you can't tell, the picture is of a set of stairs that has basically turned into a brook due to all that rain...and yes, we walked up that!)


My little mini album fits perfectly into it's own little compartment in...an upcoming project! Here's a little sneak peek at a fun project I will be sharing here on the blog on Friday.  Be sure to check back in!

I hope this inspires you to work small and get some of those photos printed out.  Working with such a small size of picture is such a fun change of pace!


Thank you as always for checking in here!  Head on over to Hetty's blog to see what creative inspiration she has in store for you.  Pop back in next month when we're staying cozy at home with the 50's Kitchen collection!

Supplies // Paper: Club Scrap: Green Print, Green Pattern Print, Light Green, Green Pattern, Cutapart sheets (London Calling), Light Blue (Spring Chorus); Recollections: vellum Embellishments: Doodlebug Designs: baker's twine, eyelets and beads from stash / Stamps: Greeting (London Calling) / Inks: Club Scrap: Sappphire and Moss Hybrid Inks / Tools: Martha Stewart Bone folder, Martha Stewart Scoring Board, Crop-A-Dile Big Bite, waxed linen thread

February 18, 2015

Wanderlust Wednesday - Waiheke Island


Back for the second installment of Wanderlust Wednesday! You can check out my first post here.

We arrived in New Zealand on a Friday, so my friend we were staying with was finishing up her work week.  I knew as I was planning our itinerary that we would need to find something to do that would keep us entertained and awake as possible to stave off jet lag. 

(Speaking of jets, we flew on Air New Zealand and it was pretty awesome.  We didn't upgrade at all, so we were just in coach, but the seats were great, the in-flight entertainment was fantastic, and you could order your drinks and warmed-up chocolate chip cookies via your touch screen.  Definitely made the 12 hour flight bearable.  I also played around with different strategies in getting the best deal on the flight prices - I ended up saving several hundred dollars by booking my domestic flights as one round trip and the international flights as a separate trip.  I also used the "home country" website to book our flights and found there was a noticeable difference in price.   It does count as a foreign transaction though, so if you go this route, definitely use a credit card with no foreign transaction fees.)

We walked from our friend's apartment to the ferry terminal and took the ferry from Auckland City to Waiheke Island.  The ferry was nice - a large top deck where you could see all of the surrounding islands around Auckland, and there were plenty of tables and chairs where you could sit and enjoy a snack on your journey.

Islands surrounding Auckland

At the ferry terminal, you could buy a ticket for the island bus that ended up stopping near a lot of wineries, so we didn't need to worry about a ride around the island.  The bus on the island is timed to leave soon after the ferry arrives, but we didn't quite grasp that concept and missed the first bus.  We walked around the ferry terminal a bit to kill some time, but hopped on the next bus as soon as possible.

Beer tasting at Wild on Waiheke

Our first stop was at Wild on Waiheke, a fun winery that also brewed beer (so definitely my kind of place).  You could do all sorts of fun activities there, like archery and giant chess, but we were just there for the booze.  The weather was nice - sunny, but not too hot (as this was May, right in the middle of autumn in the Southern Hemisphere), and it was just nice to sit in the sun with a glass of wine.

Wine flight at Stonyridge

After Wild on Waiheke, we hopped next door to Stonyridge Vineyards.  This winery was a bit more upscale.  We ended up sharing a flight of wine and an olive and bread plate - the olives were grown right at the winery as well.  A one stop shop!  We were able to sit out on their awesome deck and got to take in some great views of the vineyard.  They had this fun frame looking out over the grape vines that really lent itself to some fun pictures.
 
Pretending I'm not jet lagged

He is obviously not jet lagged...

New Zealand is typically associated with Sauvignon Blanc, and we tasted a lot of these when we were on the South Island, but Stonyridge was known for their red wine.  Being from Upstate New York, I've frequented the Finger Lakes for numerous wine tours where Riesling is far more common, so it was nice to expose my palette to some new flavors.  I definitely have a spot for Sauvignon Blanc on my wine rotation now because it tastes like New Zealand.
 
Waiheke Beach

After the wine tasting and snacks at Wild on Waiheke and Stonyridge, we hopped on the bus and got off at the beach for a little stroll.  It was getting a little overcast out, but we luckily did not get hit with any rain.  This beach was nice to walk along, and we had fun picking out our favorite beach houses that looked out over the water.
 
Up and up..
 
There was one more winery we wanted to go to and we decided to walk to our next stop, which did require an envigorating jaunt up these steps.  The view we were rewarded with though was pretty nice...


Overlooking Waiheke Beach

The last stop we had on Waiheke Island was Casita Miro, a lovely little restaurant where I had enjoyed a glass of wine and Jason had a flight of wine.  We didn't really eat a full lunch this day as we wanted to sample a little bit of everything at each of our stops.
 
The Casita Miro vineyard
 
The wine, of course, was delicious, but the little restaurant was adorable too.  They specialize in Spanish/Mediterranean food, so we got a few tapas to share.  The decor inside was lovely and it was nice to sit down and relax after our first day's adventure.
 
Relaxing after a hard day's work

We walked back down to the beach and caught the next bus to bring us back to the ferry terminal.  We were a little tired at this point (being 16 hours ahead of your normal timezone will do that to you), but we ended up pulling through just fine, got dinner with our friend, and stayed up to a reasonable hour thanks to some more wine.  We did have to get up early the next morning, because despite being in New Zealand for less than 24 hours, we had a flight to catch to bring us from the top of the North Island to the bottom of the South!

I did fully scrapbook our day at Waiheke Island, so you can check out the pages I created below:
Stop by next week for some pictures and stories from Queenstown - can't wait to share!

February 14, 2015

Club Scrap Blog Hop - Valentine's Day!

 photo Vday Hop_zpscnsd2lu5.jpg

Happy Valentine's Day (or belated Galentine's Day for you Parks and Rec fans).  What better way to share the love than on a Club Scrap blog hop?

If you found me through Tricia's blog, then you are following the hop! If you've lost your way or just want to see all the links in one place, head over to the Club Scrap blog to see a list of all the talented bloggers participating today.  You can even share your own lovely love creations with a link up on and giveaway the Club Scrap blog - make sure to read the how-to there and show off your stuff!

So, I am a procrastinator by nature, and my good friends from high school and I have been exchanging holiday cookies via the mail.  I had every intention of sending these out around, y'know, the holidays, but in between an interstate move and my decidedly slow rate of unpacking, I didn't get around to it.  So I thought I would send them as New Year's cookies.  Nope.  How about Groundhog's Day cookies? Errrr, not so much.  So I finally scheduled time on my calendar to make the darn things and they are now Valentine's Day cookies.  Of course they required Valentine's Day cards to accompany them.  Enter Club Scrap and their wonderful stamps!

Club Scrap has released several wonderful love-themed kits and stamps over the years (such as this year's Love Ink collection, and the previous Love Blooms and Love Bites sets), but their everyday stamps work just as well in creating beautiful Valentine's Day cards.   I have five cards I'll share with you today that showcase a lot of different stamps and techniques!


First up is a card that I made with a repeating phrase in ombre colors.  It's a pretty simple card, but I angled the phrase from Love Blooms to give it some interest.  I used my Stamp-A-Ma-Jig to make sure I was placing the words exactly where I wanted them.  I also used only three colors of ink on this card - I ended up with the five different shades by using both the first- and second-generation impressions of the stamp to get the lighter shades of each ink.  You can kind of tell that there were a few stray ink marks on the white paper, so instead of sending this panel to the circular file, I took three colors of watercolor pencils and my waterbrush and flicked the color from the nib of the pencil onto the paper.  It made for a pretty background and helped to cover up the ink.


The next card has a softer feel to it, especially since I used vellum as part of the cutout window on the front of the card.  I colored the image using this technique that again helped with keeping the image from Love Blooms soft and muted.


I used my trusty foam tape to prop up the top panel so the vellum could get a little light behind it.  I love the combination of the black embossed image and the softness of the color of the rose.


This card used a combination of a stamp from Love Bites and papers from various Club Scrap kits.  I first stamped the heart image on the papers I wanted to use, then fussy-cut around the image.  I used foam tape to give some dimension to the hearts.  This is a great way to use up any scraps you may have that you just can't bear to part with!


The next card just uses one of my favorite fonts that Club Scrap released.  It's very, very simple, but I love the result!  I find that if you make sure your repeating pattern goes off the page on the edges, it gives it a more put-together look. I always keep that in mind when making cards!  I really love how the pop of the neon pink sentiment looks against the gray pattern.


Finally, I couldn't make Valentine's Day cards for my gal pals and not include one for my boyfriend.  As he had to help me pack and unpack my scraproom, he knows how I feel about my crafting supplies and where he fits in.  This sentiment from Love Bites is just perfect!  I used the same stamp as I used on the third card to make the heart background, then I stamped the sentiment in India Black ink and also used black embossing powder to set it apart from the background.  Hope Jason likes it!  (ETA: He did.  He did say "...Most of your crafting supplies??"  Hahaha.)

Thanks for stopping by so I could show off the wonderful Valentine's Day collections from Club Scrap and I hope you might try your hand at recreating some of these cards for yourself!  Luckily for you, the Love Ink collection is still available in full, and you can get the stamp sets for Love Blooms and Love Bites, so run to the store and grab them before they are gone!  If you do create your own projects, be sure to link them up at the Club Scrap blog for a chance at an awesome prize!

Hop on over to the wonderfully creative and talented Hetty to see what lovely project she has to share with you.  Stop by throughout this month and on the 25th to see this month's collection London Calling being showcased and another blog hop!

Card #1 Supplies // Paper: Club Scrap: Red (Up, Up & Away), Teal (Lock & Key), White / Inks: Club Scrap: Ruby, Fuchsia, and Carnation Hybrid InksIndia Black Ink / Stamps: Club Scrap: Love BloomsTools: Inkadinkado Stamp-A-Ma-JigFoam tape, Watercolor pencils, Water brush

Card #2 Supplies // Paper: Club Scrap: White, Pink (Birds of a Feather); Recollections: vellum / Inks: Club Scrap: India Black Ink / Stamps: Club Scrap: Love Blooms Tools: Foam tape, Heat gun, Black embossing powder, Embossing buddy, LePlume markers

Card #3 Supplies // Paper: Club Scrap: White, Red Handmade (Gratitude), Red plain (Peacock), Red pattern (Take Wing) / Inks: Club Scrap: India Black Ink / Stamps: Club Scrap: Love BitesTools: Cutterbee scissors

Card #4 Supplies // Paper: Club Scrap: Black (Matrix), White / Inks: Club Scrap: Ash and Neon Pink Hybrid Inks / Stamps: Club Scrap: Concrete Jungle Font Art / Tools: Inkadinkado Stamp-A-Ma-Jig

Card #5 Supplies // Paper: Club Scrap: White / Inks: Club Scrap: WOW Red Hybrid Ink, Ruby, Fuschia, and Carnation Hybrid InksIndia Black Ink / Stamps: Club Scrap: Love Bites / Tools: Inkadinkado Stamp-A-Ma-JigHeat gunBlack embossing powderEmbossing buddy

February 13, 2015

Five Friday Favorites - February 13th Edition


Wooo, I fell off the bandwagon there a bit in posting every Friday, but I'm back with a fun list of things I've been keeping my eye on this week!

  1. I keep pinning knitting projects that I may never complete (or start for that matter) but I reeeeally want to make this skirt.  In all the colors.  Ever.
  2. My friend Linsday made this fantastic bowl out of a thrift store find - how cute and clever this this?
  3. I have A LOT of stencils thanks to Club Scrap, and I really want to try out this technique.  How do people come up with these things? [via]
  4. This article has made the rounds over the past month or so, but I thought it was worth a re-read so close to Valentine's Day.  Some interesting questions to talk about with your significant other over a candlelit dinner.
  5. Jason and I are catching up on this season of Parks and Rec and this insult from Ron Swanson really hit me in my scrappy heart (and I couldn't stop laughing). [art via]
Whether you are celebrating Galentine's Day, Single Awareness Day, good ol' Valentine's Day, or Just Another Saturday, I hope it's a good one!

February 8, 2015

Club Scrap Artist Team - and London Calling!

 photo Artistteambadge_rsz_zpsee8cbeff.jpg

Aaaaaand I'm a week (well, six days) late in announcing this, but I am officially a member of the brand new Club Scrap Artist Team!  I have been a member of Club Scrap since April of 2008 and it is such an honor to have the opportunity to showcase my most favorite-est monthly kit club.

If you've frequented this blog, you'll see that a lot of my scrapbook pages, cards, and projects are made with Club Scrap supplies - I love their papers because they use high-quality, beautiful cardstock, have unique, exclusive patterned paper and cutaparts, and their stamps are made with amazing red rubber (great for those very detailed designs!)  I've consistently received their Lite kit for many years (perfect for just a taste of this club month by month), but as an Artist Team member I'll also be showing off the full Deluxe kit during my term.  I'm so excited for this month's kit - London Calling!  It's perfect for documenting a trip to London (obviously), but the pastel color palette is also great for spring pictures, outdoor snapshots, and general travel memorabilia as well.


This month I'm loving the mix of the watercolor backgrounds with the iconic views of London, the adorable stamp images such as the mustache, Wellies, and the "Keep On..." slogan, and my absolute favorite, this Underground washi tape.  I've just broken into this kit, so I made a quick and simple card for a friend who recently had a baby boy.


Obviously, I wanted to feature that adorable mustache stamp, so I paired it with a die-cut bowtie and a quick stamped sentiment and I was good to go!  (If you don't have a similar die or cut file, but you do have a Envelope Punch Board, you can make a similar bow using this technique.)  I love the subtle green pattern on the cream paper, and the detailed texture on the light green paper adds a bit of interest to a solid cardstock.


I added some foam tape under the mustache and the folds of the bow tie to add some dimension and help the bow tie keep its shape.  I think that the shades of the blue and green in this card makes it great to greet a new baby with!

Keep checking back this month to see more details of the London Calling kits!

Supplies // Paper: Club Scrap: Green Patterned, Blue, Light Green (London CallingInks: Club Scrap: India Black Ink /  Stamps: Club Scrap: London Calling Collection; Lowercase alphabet stamps (similar) / Tools: Studio Calico: Bow craft die;  Foam tape

February 4, 2015

One Little Word and Challenge YOUrself Layout


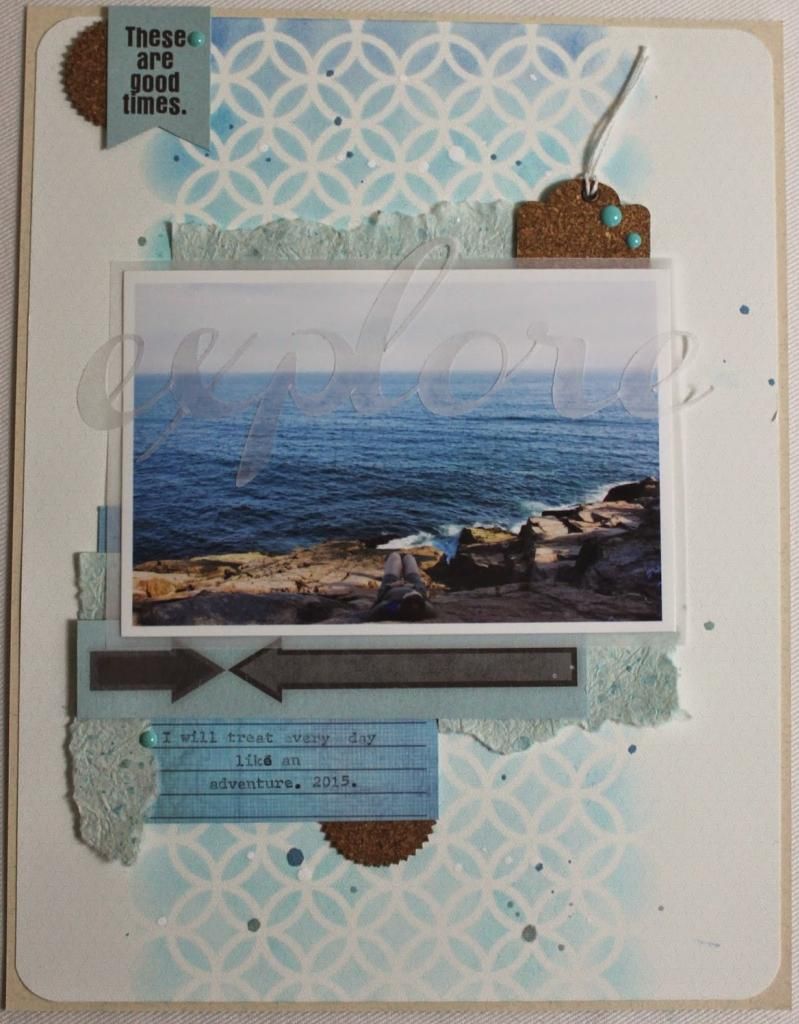
I finally made my first layout of 2015 - in February! (Gasp - a whole month went by without scrapping.)  I'm behind on my January prompts for One Little Word, so I knew I wanted to make something creative to keep my word visible in my life.


This layout was inspired by the first challenge of 2015 over at Challenge YOUrself, where the task was to incorporate a picture of yourself and your One Little Word into a layout.  Check out all of the wonderful submissions for this challenge here!


I used this wonderful picture taken by my friend Alex as my focal point.  This was taken on the coast of Maine this past summer - my friends and I spent a weekend in Acadia National Park on our way up to Cape Breton in Nova Scotia.  I love pictures that have a lot of white space to embellish on, so I used this opportunity to cut out my word in vellum using my Pazzles.  It's a bold but subtle title that doesn't detract from the beautiful picture.


I switched this layout up from my normal 12x12 and used 8.5x11 papers. I'm planning on incorporating this and my other monthly OLW projects into my Project Life album, so the smaller size will help designate these from the 12x12 spreads.  I had fun with a lot of different elements on this smaller canvas: I used a mask and three shades of ink to create the ombre vertical pattern in the middle, I used three shades of mist to create some splatters, and I used a mix of blue and cork elements to finish off the layout.  I'm especially in love with this handmade mica paper from Club Scrap - alas, it appears to be sold out, so I need to start hoarding what I have left!

Here's to the first layout of the year and many more to come!

Supplies // Paper: Club Scrap: Kraft, Blue patterned, Handmade blue mica (Aspen); Recollections: vellum / Inks: Club Scrap: Sapphire, Lagoon, and Ocean Hybrid Inks, India Black Ink / Mists: Mister Hueys: Watercooler, Opaque White; October Afternoon Sprinklers: Lagoon / Embellishments: Club Scrap: Cutaparts (Mirror Mirror), Sparklets Dots (Lakes); Little Yellow Bicycle Cork Shapes: Zig-Zag Rounds and Tags / Stencils/Masks: Club Scrap: Friends / Tools: Ink Applicators, Typewriter, Pazzles, Crop-A-Dile Corner Chomper, Recollections Foam Adhesive Circles, Xyron Sticker Maker / Font: Channel

February 2, 2015

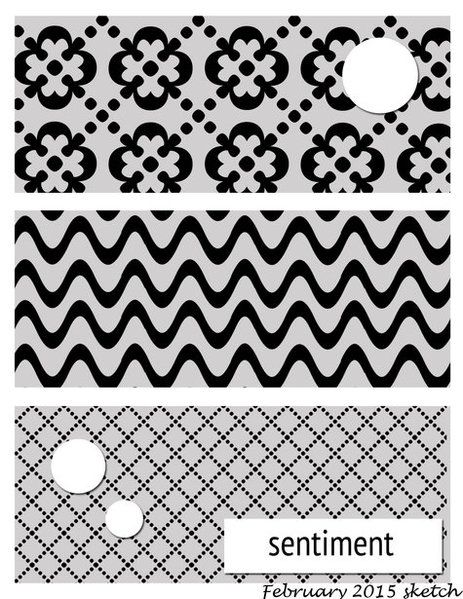
Club Scrap Card Sketch Challenge - February 2015


New month, new sketch at the Club Scrap forums!  As I was setting up my new craft room, I got inspired to use a lot of patterns on one card, whether it be patterned paper, stamps, or stencils.  It's a fun way to use a lot of fun products in one card.  I ended up with a card with a bright color palette, but I kept the stamps I used somewhat subtle.  By using a tone-on-tone look on all three panels, I was able to use bold patterns without being too overwhelming.


I had fun with a bright and cheery mix of pink, orange, and yellow - perfect for a cold and wintry day!


I had colored bottle caps and circle cutaparts in my stash from a previous Club Scrap kit.  I ran the bottle cap through my Big Shot to flatten it a bit - I really like how it turned out!  I used pop dots to adhere it snugly to the card.


I had some black faceted jewels (aka my bling) in my stash that I used on the bottom panel to even out the large embellishment on the top panel.  And while I haven't forgotten anyone's birthday yet (I think), this snarky sentiment is always handy to have around, just in case I'm not quite on top of things.

I hope you can join in on the challenge thread this month!

Supplies // Paper: Club Scrap: Black (Matrix), Pink (Graffiti - on sale!), Orange (All That Jazz), Yellow (Fire & Ice) / Inks: Club Scrap: Fuschia, Tangergine, and Topaz Hybrid Inks, India Black Ink / Embellishments: Club Scrap: Bottlecap and cutaparts (Bold Blooms), Bling from stash / Stamps: Club Scrap: Tilescapes, Hopes, Crusin', Peacock  / Tools: Inkadinkado Stamp-A-Ma-Jig, Sizzix Big Shot, Pop dots
09 10